Saturday, February 20, 2010

Baby girls need BIG bags


I just went to a friend's baby shower last weekend and was very happy to see this bag get a great home with people I love! I made the bag back in October when I was about 6 months pregnant and thought I might be able to use it for myself :o).. oh well. I did love the bag though, and knew I wanted it to go to a good home.Thankfully some friends found out about that time that they would be needing lots of girl things come march, so I hung on to it until last weekend when I had the opportunity to pass it on.


It's funny though, because the ribbon I used down the sides of the front panel was given to me by the same person who has it now. Almost 4 years ago when Samuel was born my friend Clair brought by a present  wrapped so pretty with this ribbon, and now I get to give it back. How funny is that? That just shows how long I will hold on to a piece of ribbon or anything that I think might come in handy sometime down the road. Not sure if that's always a good thing, but I just cant help myself.


I do really like the pattern and think I should make me a very BIG boy bag with it.


When I do I'll take pictures and post them along with the pattern.

Friday, February 19, 2010

Picture Perfect


I never knew where to put those extra pictures and things that always ended up just laying on a desk somewhere for at least 6 months. The other day I had an idea to take a pair of linen pants, find some buttons and twine, and make some wall space useful. My mom gave me the pants 2 or 3 years ago because they were too big. I always thought I would get around to making a little boy's suit for easter but never did :o) I always have such good intentions. It was really easy! I cut up a cardboard box and used tape across the folded parts to make it stronger, used a thick padding for a quilt (not sure what it's called), and stapled it around all sides. I cut one seam out of each pant leg and sewed the two pant legs together.


I stapled the pant pieces to the cardboard, wrapped some twine around at an angle one way and then the other. I sewed cute buttons through the cardboard, making sure they were tight enough to hold pictures well. I also used the little flaps from the waistband in the corners and made flowers out of a scrap from the pants and old ribbon. I like it!


(Eventually I'll write something really meaningful on those blank pieces of paper)

Wednesday, February 17, 2010

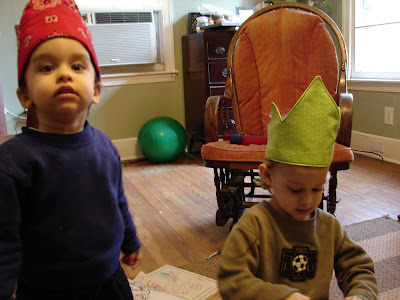
A Morning With Crowns


When Samuel woke up the other morning he asked if I would make him something special. He loves to play prince and dragon, so I thought a prince should have a crown. I started by roughly measuring his head with paper.


Then I cut what I thought looked like a crown. If I make more I might do it a little different.


I cut a layer for front and back and used a thick fabric for a middle layer.


My middle layer didn't go all the way but was still enough to make the crown stand up. With right sides together and ribbon or ties in between, sew around sides and top.


Trim edges and snip corners and points.


Turn right side out and iron. I had about 1 inch extra at the bottom which helped to make it just a little thicker.


Press well and sew around all edges.


And finished!


A very happy Josiah! What more could you want but a crown, blanket, and fingers?


Now if they would only hold still I could get a good picture :o)
What a sweet moment.


And now the moment is gone :o)


Every Girl Needs Some Black Panties!

This is my first successful attempt at underwear. I made a pattern from a pair I had, but need to tweak it a bit. After wearing them through 3 pregnancies and in between they are slightly out of shape to say the least.


I had some very elasticy (?) material, so I didn't need to add any elastic to the legs. It was also finished on one side so that worked well  for the top. Would be nice to get some lacy elastic for future use. I sewed the sides and bottom, adding a piece of cotton from a old shirt.


I turned under the top of the cotton but at the bottom just did a straight stitch, then a zig-zag to finish the edge.
Maybe next time I will turn under the bottom too.


Turn under and zig-zag around the legs.


I never took a picture right side out but even inside out they look pretty good if I do say so myself!
Next maybe I should recover my ironing board :o)

Monday, February 15, 2010

Leak-Proof Nursing Pads


My mom had a great idea, when I had my oldest son, to use plastic diaper covers in my nursing pads.
Nothing else had ever worked because I don't just leak - I spray :o) I made 8 or 10 pairs, but after 3 years of nursing my first 2 boys, I definitely needed a few new pairs for the third time around.
Thanks Mom!

Materials needed:
One large cup (or whatever size seems best - and cleanliness is optional, 
as you can see from the coffee stains :o) )
Old cloth diapers, or any soft, absorbent material
Plastic diaper cover (can substitute wool, fleece, or other water-resistant materials)
Sharpie marker


I used 8 layers total (4 on each side), of a very thin cotton diaper. 
Depending on the type of material used,
adjust the amount of layers for desired absorbency.  One layer of plastic in the middle.  
I got 5 pairs out of one 12-month size vinyl diaper cover.


I used a very large coffee mug (4 inches diameter), giving me enough room to sew and trim,
with the finished product being 3 1/2 inches, give or take.  I used a straight stitch and then
trimmed it really close.


I set my machine to the tightest zig-zag to finish the edges.


Finished product!  No more leaky shirts!