
Saturday, July 24, 2010
Reupholstering Help
I've been thinking about recovering a chair of mind for the last 10 years now. WOW, I'm not even old enough to be talking about something from 10 years ago! Anyway, I guess I am and THIS is so helpful for those of us who don't have any clue what we're really doing :o) Check it out if you're unsure how many yards of fabric you'll need for different pieces of furniture.
Wednesday, July 21, 2010
My New Friend
As you saw in the last post, I did get around to making a dress form a few weekends ago. It was so nice to have while working on my dress!
I told Tim that I should name her, but he thought that was weird. I still think she needs a name though. So does anyone have ideas? Maybe Molly the Mannequin.

I looked at a lot of tutorials and videos on youtube to see how to make one and THIS and THIS were very helpful! It was a humorous process, but the end result gave me something very useful!
I did NOT take pictures of myself being wrapped up in duct tape. Sorry.
Most tutorials I saw said to do 3 layers of duct tape. We only did 2, but I had some kind of extra heavy duty tape, so it worked well. Then I got some much thinner, regular duct tape, and added after it was on the stand to smooth out the look a little more.
You can see how thick and stiff the first kind was here.


This is what my sewing corner usually looks like. Mess all around, Caleb's blanket and toys on the floor right beside me, and me usually looking out the window watching Samuel and Josiah digging in their new sand box.

One day I'll have a room all to myself, full of fabric and endless things to work on. But for now this is what I've got, and it works just fine. Funny how any other mess around the house drives me completely crazy!!! But my mess...not so much :o)
P.S. Thanks mom for the lamp stand!!!


I looked at a lot of tutorials and videos on youtube to see how to make one and THIS and THIS were very helpful! It was a humorous process, but the end result gave me something very useful!
I did NOT take pictures of myself being wrapped up in duct tape. Sorry.
Most tutorials I saw said to do 3 layers of duct tape. We only did 2, but I had some kind of extra heavy duty tape, so it worked well. Then I got some much thinner, regular duct tape, and added after it was on the stand to smooth out the look a little more.
You can see how thick and stiff the first kind was here.

Here I used long strips from top to bottom and just made a little snip wherever needed to go around curves. it gave a much nicer look! As nice as you can get duct tape to look anyway :0)

This is what my sewing corner usually looks like. Mess all around, Caleb's blanket and toys on the floor right beside me, and me usually looking out the window watching Samuel and Josiah digging in their new sand box.

P.S. Thanks mom for the lamp stand!!!


Saturday, July 17, 2010
New Dress!!!
I'm so excited to share what I've been working on the past week!

I've been dying to make something for myself for the last month or so, but wanted to wait for the right project before I just started on whatever without really putting thought into it. We have a business conference coming up in a few weeks, so in the back of my mind I was thinking it would be really nice to have something new, but after looking through my stash of fabric and patterns nothing was quite business enough. But then 2 weeks ago I was kidnapped by a good friend (who must have known I needed a few hours alone) and taken to Hancock fabrics where we took our time looking through the patterns and having some good girl talk!
I love dresses, but don't wear them much because I'm always nursing a little one and to do that in a dress is usually impossible! If we're at church I have to go to the bathroom and get completely undressed and then dressed again, so it's just not worth it to me at this time of my life :o)
So when I saw this pattern with buttons down the front I was so excited!
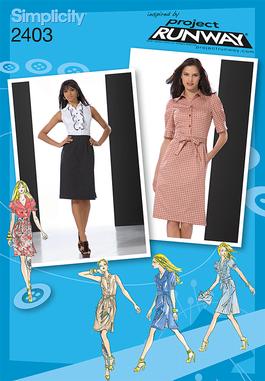
The excitement was also in part because all Simplicity patterns were on sale for $1.00 !!!
That totally cuts the cost of what you're sewing! I love that there are so many variations that can be created by changing the collar and sleeve combination. I already have plans for a second one with the short sleeves and a ruffle down the front ( bottom right on pattern).

After our girl-talking and pattern-looking we hit a 80% off remnant pile. I found 1 1/8 yard of this pretty, slightly shiny navy blue, and after the 80% off got it for $1.50!
Once I added the notions and zipper my total was a BIG $6. I love when that happens! Sometimes it seems like you get something pretty cheap but then end up needing all these extra things that bring the cost up more than you had planned. So for not even planning on a dress beforehand I really did good! I told Tim that I "SAVED" soooo much on the dress that I thought is was completely reasonable for me to get a new pair of shoes to go with it :o). He said he was glad I thought so :o(. But it turns out I happened to find some blue heels for $7, and I also had some mothers' day shopping money waiting for a special skirt but didn't think $7 would cut into that to much, so I did get new shoes to match!!!! :o)
Happy me!

The pleats are so pretty and feminine, and I love the pocket and waistband done in a contrasting fabric (stolen from the leftovers of my mom's dress :o) ).
Pockets are always needed when you have little boys handing you weird things all the time!


This pattern was very easy to follow and fits perfectly! I didn't change anything. Its sizing chart is right on, and that's not always the case for patterns (or clothes in general for that matter). I've said before that I line everything. Well this time I didn't, but I made my first slip cut on the bias. I was going to line the skirt part of the dress, but then thought if I make a slip I can wear it under any dress and skip that extra step in the future. For skirts I prefer to have lining sewn into it already so there aren't any more layers to be pulling on or that get turned and twisted when you sit and stand, but for a dress I don't mind a slip underneath. So for my birthday my mother-in-law Donna had given me a gift card to Hobby Lobby, so off we went with that thought in the back of my mind, and I saw in the remnant pile (you've got to love those!) a yard of cream satin for $2. So I grabbed it and went home to see if I could find a pattern for a slip in my stash. At first I was thinking I could use a tank top and make it longer or a bias cut skirt and put a top on it, but then I found this in some of my mom's stuff and...


PERFECT I have a new slip!

So I'll leave you with the dress one more time.

Not bad for my first collar.

And a close-up of the sleeve (or non-sleeve :o) ).

I couldn't be happier and can't wait to wear it next weekend!!!
Monday, July 12, 2010
Happy Late 4th
What a great weekend!
It was a combined 4th and Birthday weekend. 2 of my brothers share the same birthday on June 30th and my Birthday is July 8th, so we usually have supper together at some point in between. Since the 4th landed on a Sunday this year it seemed like a good day for a party! In my family there are always so many people around it usually feels like a party and really can turn into one pretty quickly! We didn't have anything huge planned, but it was so fun to have EVERYONE together! With my parents, all 9 kids, plus spouses, grandchildren and few extra friends, we had 32 people (to the best of my memory :o) ). You can see a picture of most of us together at my parents' blog HERE. And read about their adoption journey.
It was a beautiful day in July for SC! I don't ever remember not melting outside on the 4th, but it was very pleasant I thought. We had good food and lots of dessert! Also some presents, which are always my favorite :o)
Here's my wavy flag cake.


I only have one not-that-great picture of the 3 Birthday people.
Tim 1 (my oldest brother) 35, me 25, and J.D. (brother right after me) 23.

I love this picture of Samuel!

Caleb on Hope's shoulders.

But the biggest hit was the piñata!!! The kids (big and small) had a blast!
As you can see, everyone really gave it their all.
Here's my Dad giving instructions before we begin :o)

Samuel's getting dizzy.


Andrew's turn (new youngest brother).

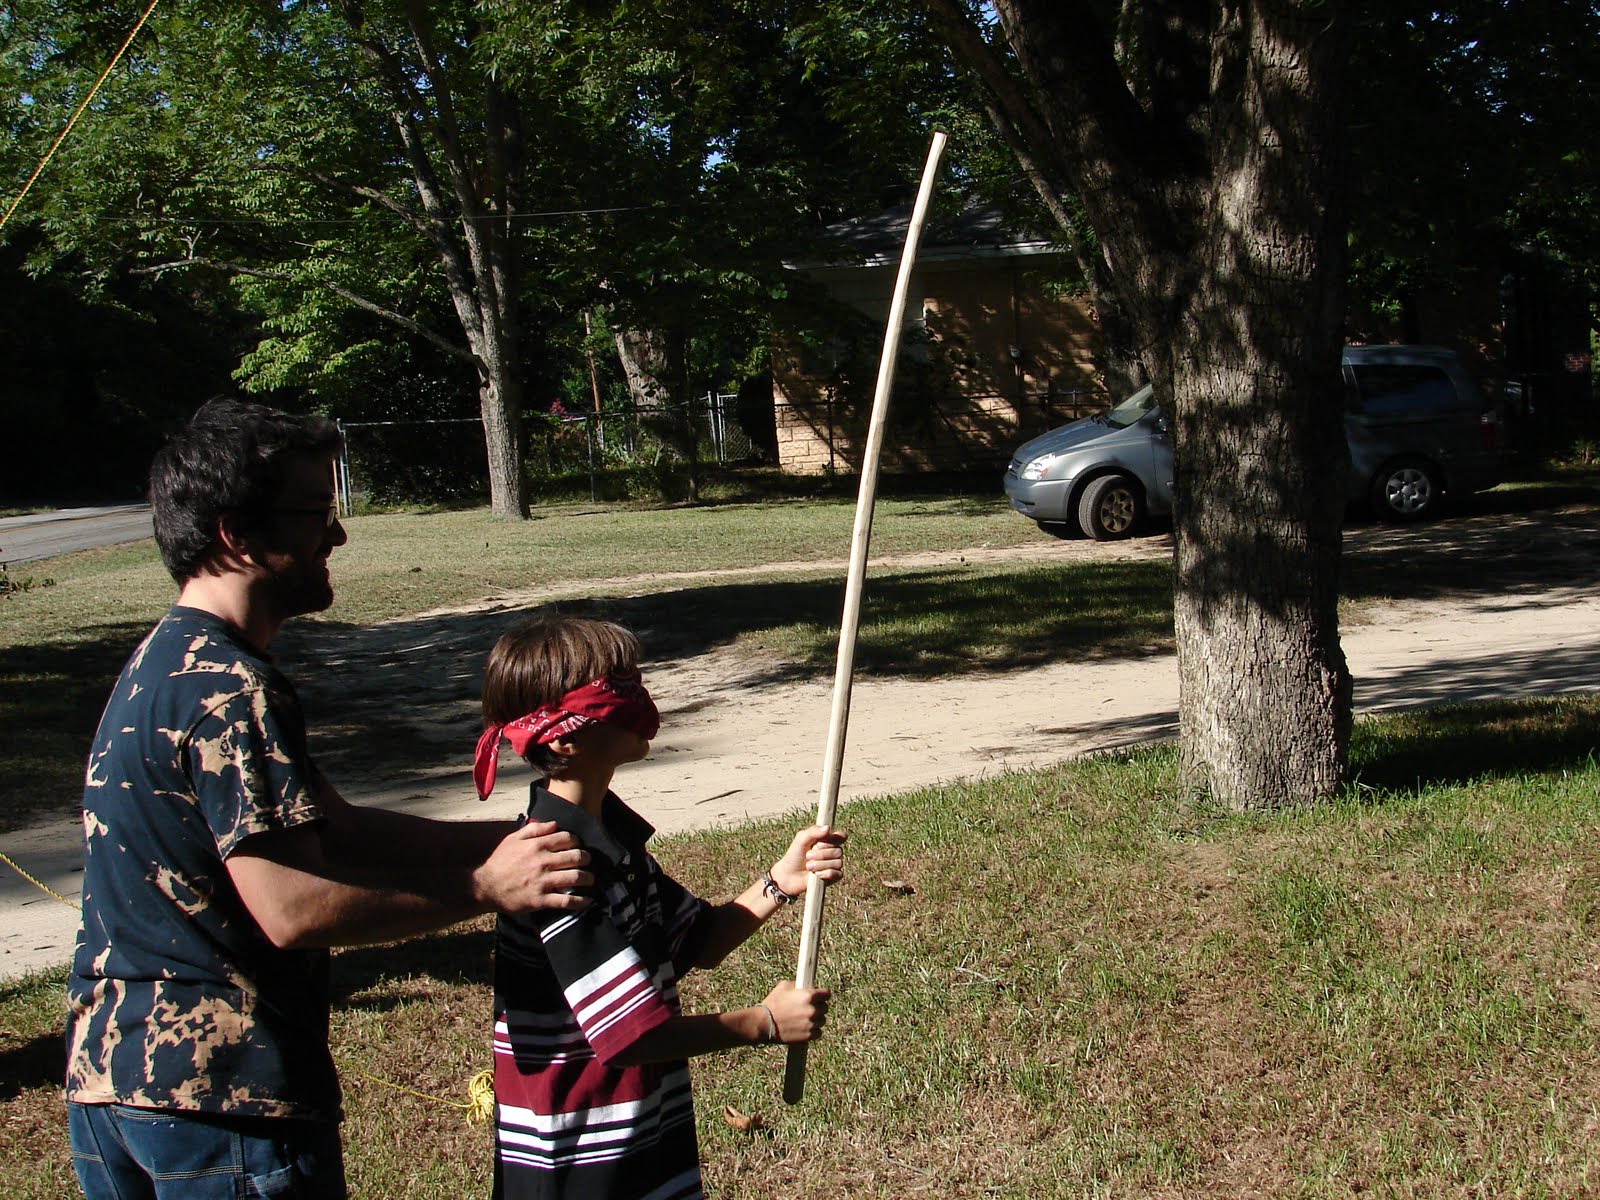

Dad never makes it easy :o)

Pasha (#7 from oldest to youngest).

Aaron (nephew).

Conner (nephew).

Meg, my newest sister-in-law.

Ja (brother-in-law).

He looked like he was pretending to be a jedi knight with that stick :o)
And he will probably hate me for saying that!!!

We didn't stay for the fireworks because that is NOT Josiah's favorite part! We held him a lot over the weekend once it was dark outside :o( He was very brave.
Tim was off work Monday too, so we got tons done around here! I love when you feel like you actually get things accomplished. And the boys loved having Tim for the whole day! It was a weekend full of fun!!!
Thursday, July 8, 2010
My Grandma's Hands
Click HERE to see a picture of my Grandma's hand holding Caleb's hand when he was not even a day old. I'm so glad Tim took this picture! In it she is wearing my Grandpa (Beepa)'s high school ring that she had worn so long the writing on it was barely visible anymore. Seeing this makes me miss her a lot today, because it's my Birthday and for the first time she's not here to wish me a happy one. I am so glad she was able to meet Caleb and enjoy his first few months before she passed away! She had 6 children, 26 grandchildren, 48 great grandchildren and 9 great great grandchildren. She passed on April 13th and was 88 years old. What a impact on the world!
Wednesday, July 7, 2010
I Love Wool!
So, I'm still working on my diaper cover pattern and I think I'm just about there.
Here I used chalk to give a rough idea of what I wanted. I like them to be a bit on the big side so we have lots of growing room. For us, after about 6 months old (which is just where we are right now) is about the largest cover we will need because all 3 boys have hit 20 lbs at this point, so with a cover that has room for getting mostly taller and just a little wider we are really set until they are in undies all the time. Wool is nice and stretchy, so as long as the cover is tall enough you really get a wide size range! I like to have 2 covers in a small size and 2 in a medium, but at least 3 or 4 in this large size so if I have 2 children at a time that need one (like a new baby and another that needs one at night) there's enough to go around.

I traced it on paper, then made a new line on one side that I wanted to try for a better fit.
I used chalk to trace the new line on the cover and sewed around, putting elastic in the sides.

I use 1/4 inch elastic in the sides and 1/2 inch for the back. Usually :o) Or whatever I have at the time, but I like bigger at the back.
I try to use the bottom of the sweater for the back so it's finished already.

Just a zig-zag stitch and leave the top open.

Add some velcro.


And finished!

And here's my BIG guy :o)
It comes up just over his belly button, so there's plenty of room but it still fits fine now.

These are kinda funny pictures of him, but it's hard to get a good one when he's flapping around constantly!

I think it's just as hard to get a good picture of Tim :o)

I live with boys all around me and none of them know how to be serious for a minute, but I love it!!!

Monday, July 5, 2010
Airplanes and Automobiles Part 1
So this is my latest addition-in-progress to the boys' room.
I started about 1 year ago painting their room with cars, trucks, helicopters and now a big blue airplane.
I did most of the room last spring, and sometime in the summer before I was too sick pregnant I painted the helicopter, so now I thought it was about time to finish everything I was planning before I got so pukey last year :o)
I always start by drawing whatever it is on paper, then tape it together and cut out the shape so I can trace it onto the wall.

You can see a faint outline if you look close.

Here with a little more detail.

And here with one coat of paint.
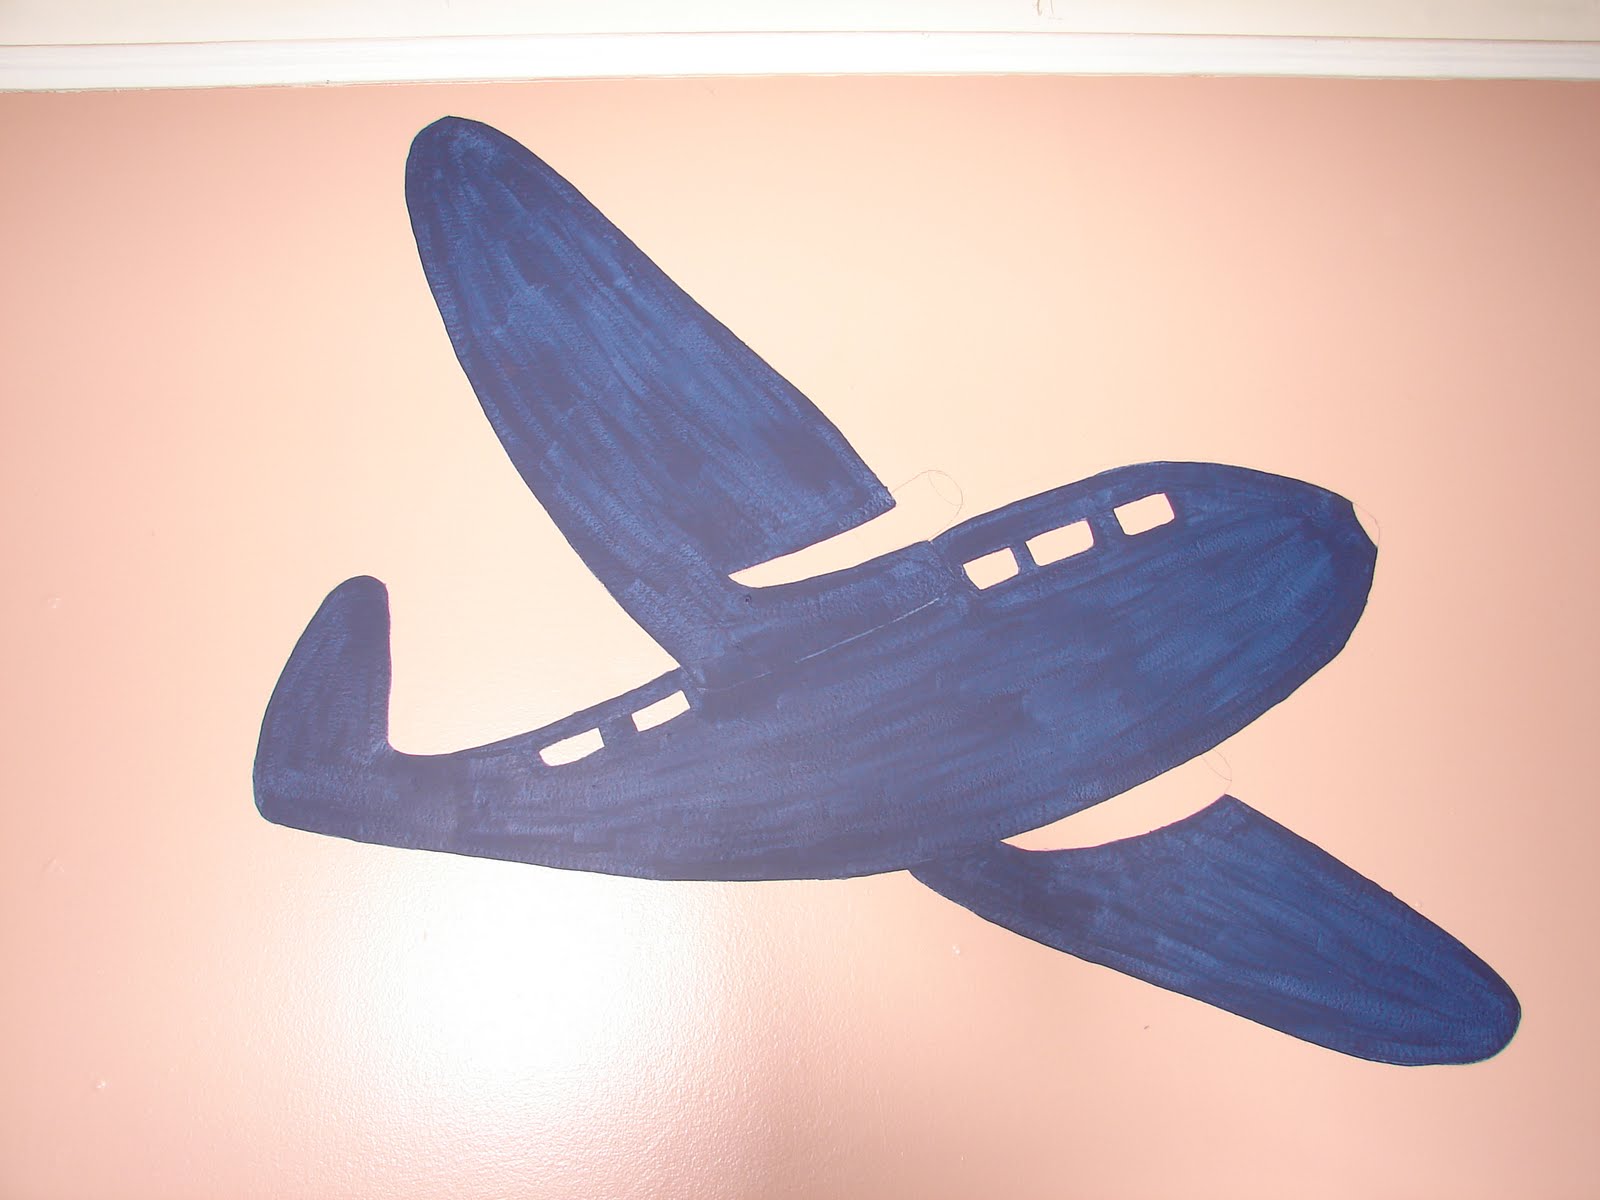
This is maybe 3 coats.

And the helicopter on the other wall.

It took me 2 Full days to hand paint all those stripes. But I did that part a year ago. Thank goodness I won't have to do that again!!!

They have cars and trucks all the way around.

I still need a few details like yellow lines on the road and maybe some clouds around the top. That will have to be part 2 :o)
Subscribe to:
Posts (Atom)