Well, it's only 10 pm and I've just finished Samuel's dragon costume. Not bad if I do say so myself. I wasn't really sure what I was doing when I started, but it came together pretty quickly. I went looking at nap time for something to use as material, and I found this jacket that also has pants to match. Perfect!
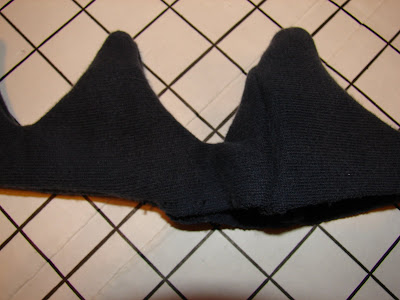
I also found a blue sweatshirt that he never wears to use for the spikes.
I ripped the seam open on the outside and inside lining of the hood. Then cut down the middle of the back, but not through the band at the bottom.
Here you can see the inside lining of the hood pulled out of the way, so the spikes will only be sewn through the outside layer. I can then sew the lining back, so it will have as clean of a finished look as possible.
I cut up the blue sweatshirt and pieced a long strip together, then folded it in half and sewed spikes.
Measuring from the hood to the waistband, I sewed the rest closed for the tail, making sure there was enough room to turn it. Only the tail is sewed closed - the rest of the spikes are open.
I turned it all right-side-out...
..and pinned it in place, with spikes on the inside :o) I hate it when I sew something backwards and have to spend the next hour ripping it out, and then start all over again. So many times I've turned a 30 minute project into an hour or more, because I don't pay attention, and end up making really stupid mistakes.
I used a straight stitch and then a zig-zag on the edge for a nice finish.
Then I sewed the lining back together. I probably should have done this part by hand, but I tend to be more lazy when sewing things for my family than when I sew for other people, so I just did it on the machine. I don't mind a tiny seam on the inside.
I went back and did a top stitch just on the bottom of the tail, and made sure to back-stitch a little extra, where the tail comes away from the jacket.
The inside looks pretty nice and neat.
I like how the tail curls a little bit, because of the top stitching.
And finished. So fast, and so easy! I should have put a little stuffing in the spikes on the hood to make them stand up really straight, but I forgot and didn't want to rip it apart. I think it will stand up fine when it's being worn though. If I was using a thinner fabric, it would for sure need some stuffing, or at least interfacing.
Start to finish, it probably took me 45 minutes. Maybe even less. I'm not sure because I did it in 2 parts, but it was really fast!! And really easy!!! And really cute!!!! I can't wait to see it on Samuel. He's so excited to be a dragon for his party.
Now, only about 12 more things for me to make. That's ok though, I still have 2 whole days left :o)


It was soooo cute on him! Even if I am a partial Granny! Hurry and post those photos!.
ReplyDeleteThis is too cute. I would love for you to come link up some of your great crafts for boys at my What are little boys made of? Weekly Round up!
ReplyDeleteseven thirty three
This is soooo great! I found your blog from one of the comments on i am momma hear me roar and it seems like we could be great friends...if only lived in the same city ;-) I also choose a very natural parenting path.
ReplyDelete